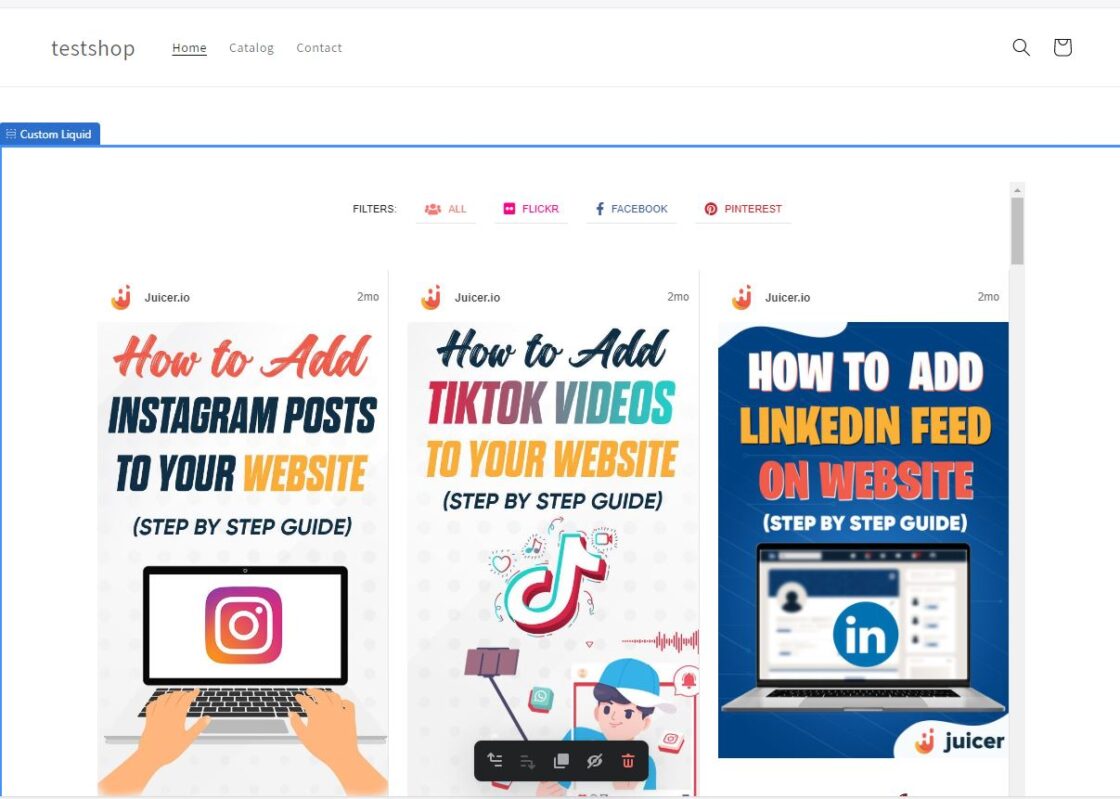
So why should you integrate social media feeds into your Shopify site?
There are many advantages for businesses that add a social media feed to their Shopify website. First, it’s a potent advertising medium with the potential to raise product profiles and stoke brand loyalty. By showcasing customer reviews and testimonials from platforms like Instagram, Facebook, Twitter/X, LinkedIn, and YouTube, a company can show the world the difference it has made in people’s lives and foster a sense of community around its brand. As a result, it’s possible for the company to gain more social media followers and endorsements from satisfied customers, boosting engagement.
Embedding a live feed of social media updates on a Shopify website can enhance the user experience in addition to the marketing benefits. Integrating Instagram, Facebook, Twitter/X, LinkedIn, and YouTube updates in real-time makes for a more dynamic and engaging shopping experience, keeping customers up-to-date on the latest happenings. This not only boosts engagement but also increases the chances of a customer making a purchase and the time they spend on the online store.
Here we will show you how easily you can create and add a dynamic social media feed on your Shopify store today.
How to Add Social Media Feed to Shopify Pages
Add Social Media Feed to Shopify for Free Using App Market (With Limitations)
The Shopify app market is home to a number of useful apps, including ones that allow you to integrate various social media feeds into your website at no cost. They’re simple to employ, but you’ll find there are some restrictions. Take a look at this free integration example:
Step 1:
Go to the Shopify app market and search for a relevant app like POWR and install it.
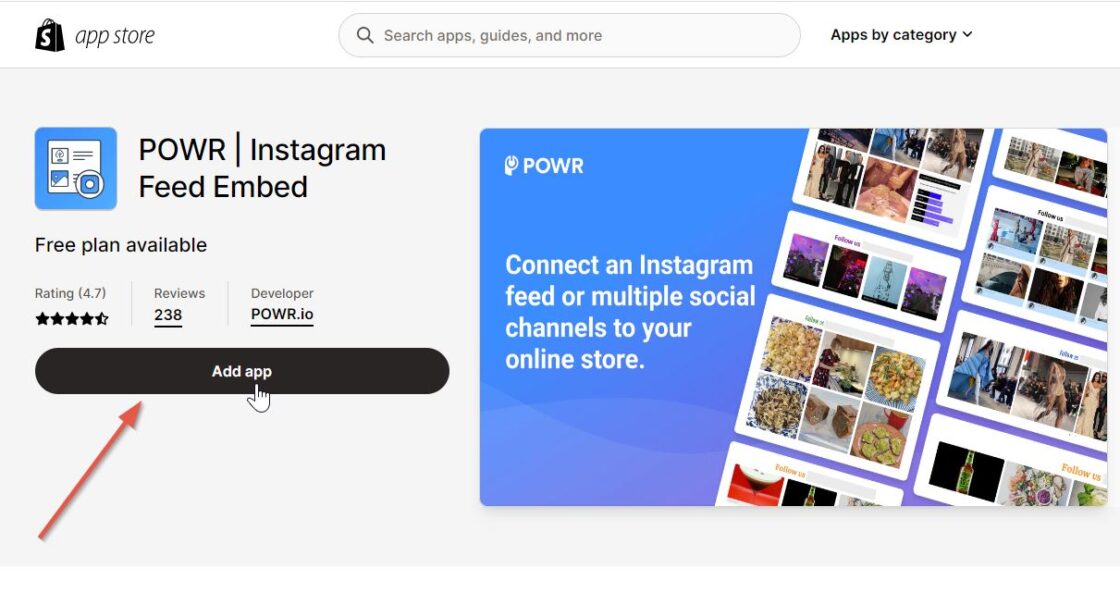
Step 2:
In this case, if you use POWR, it will take you to their dashboard for further settings. Click on the “Add Feed” button from the left sidebar.
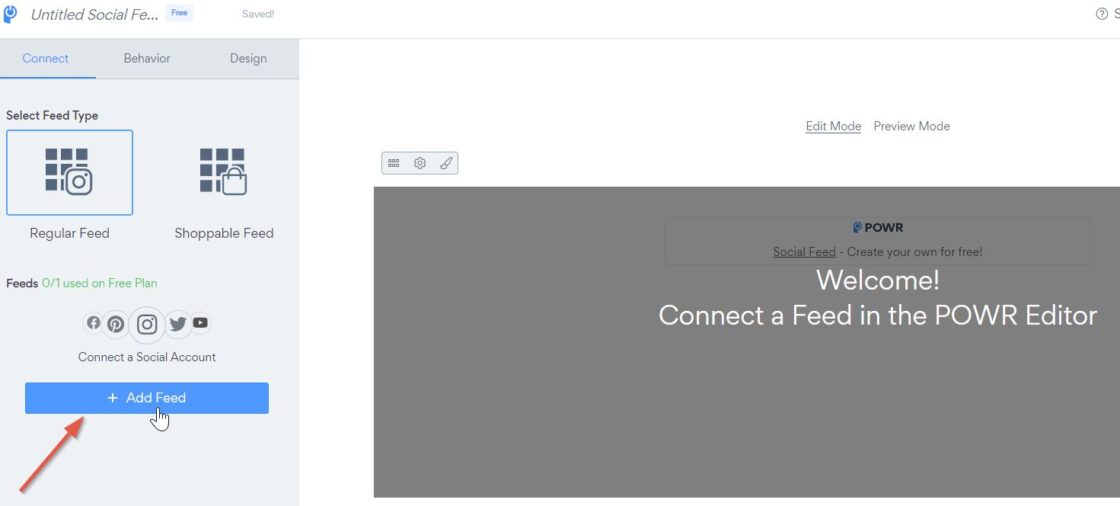
Step 3:
Select your desired social media platform and provide your username or URL to embed the feed. Then click Done.
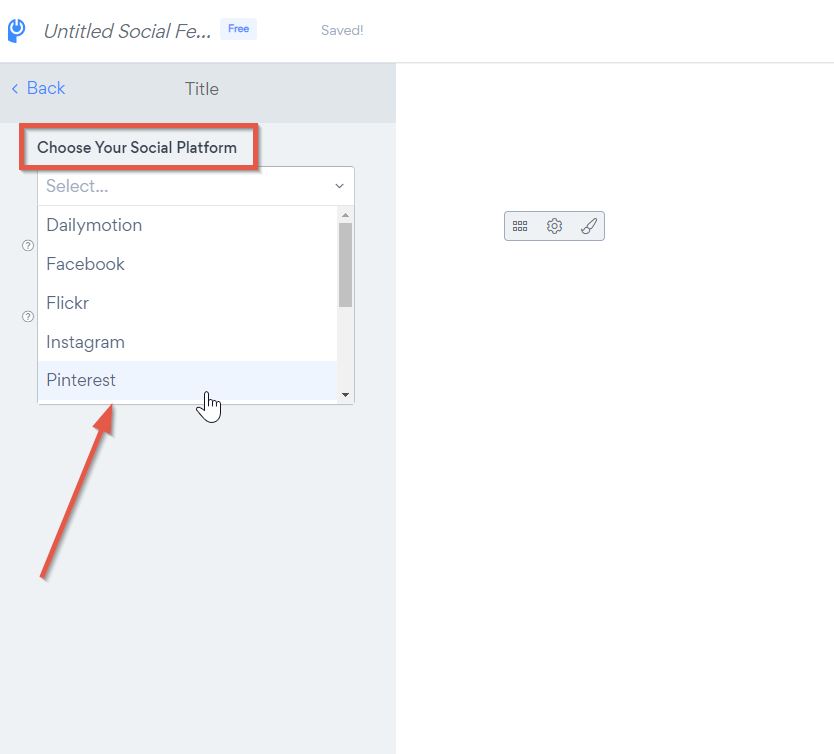
Step 4:
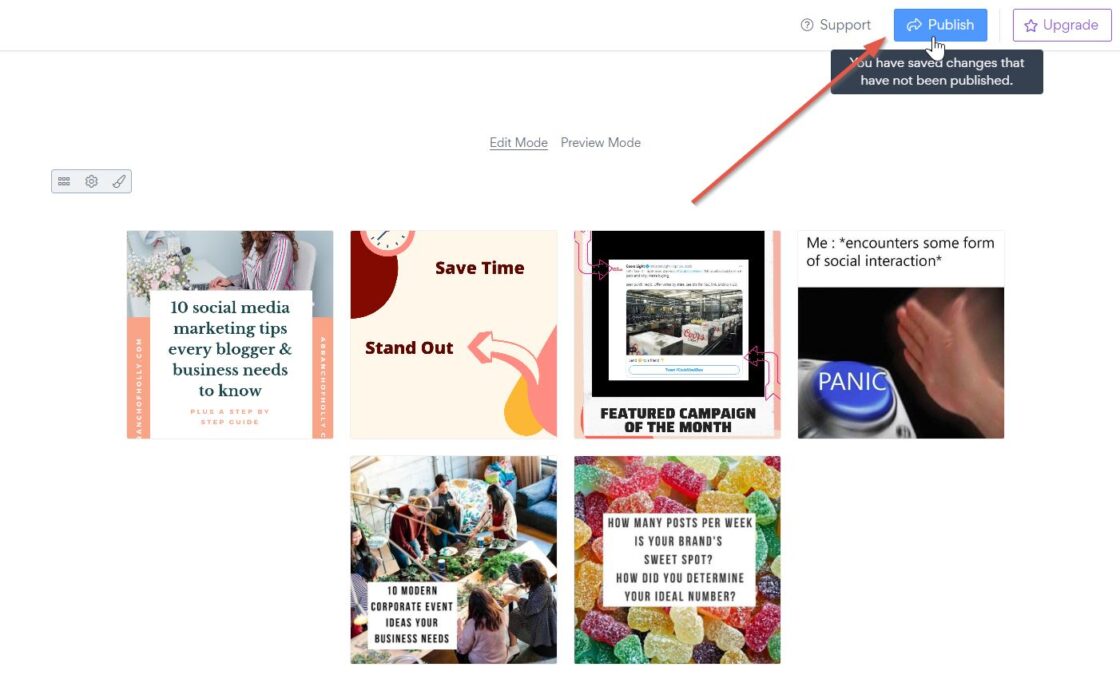
Now you will see your social feed is loaded on the right side. Go ahead and click on the “Publish” button from the top right corner.
Step 5:
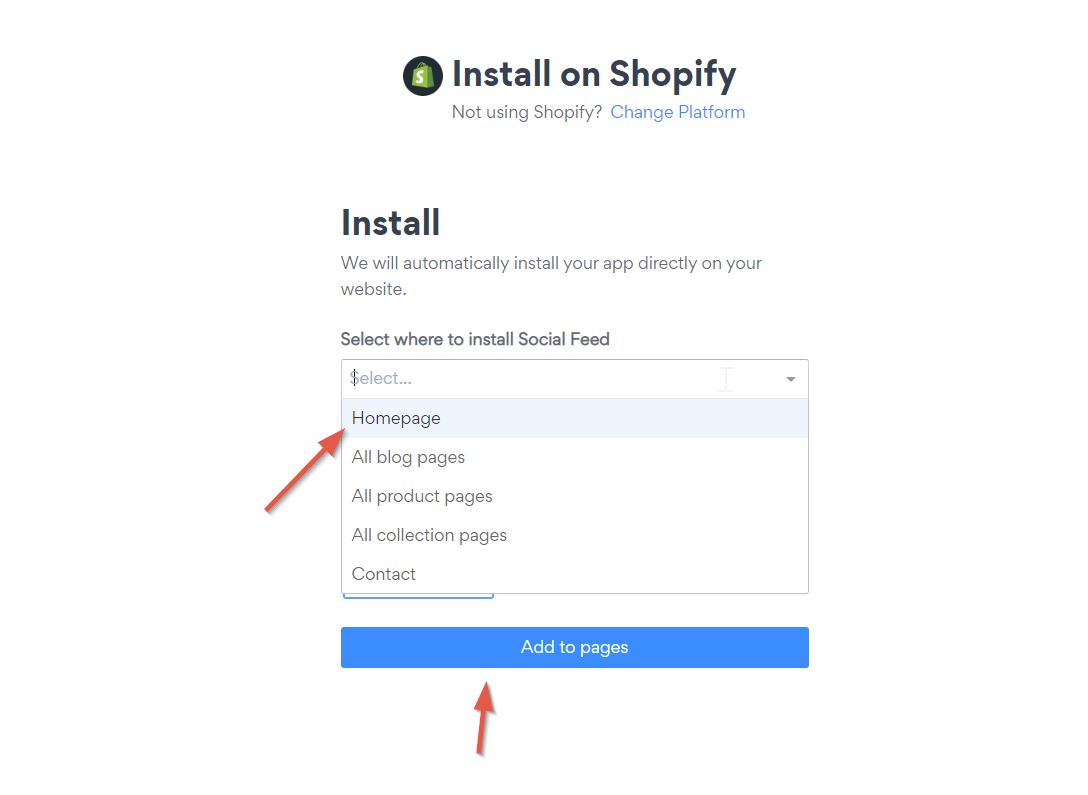
Now select a page where you want to show the feed and choose the position. Then click on the “Add to Pages” button at the bottom.
Step 6:
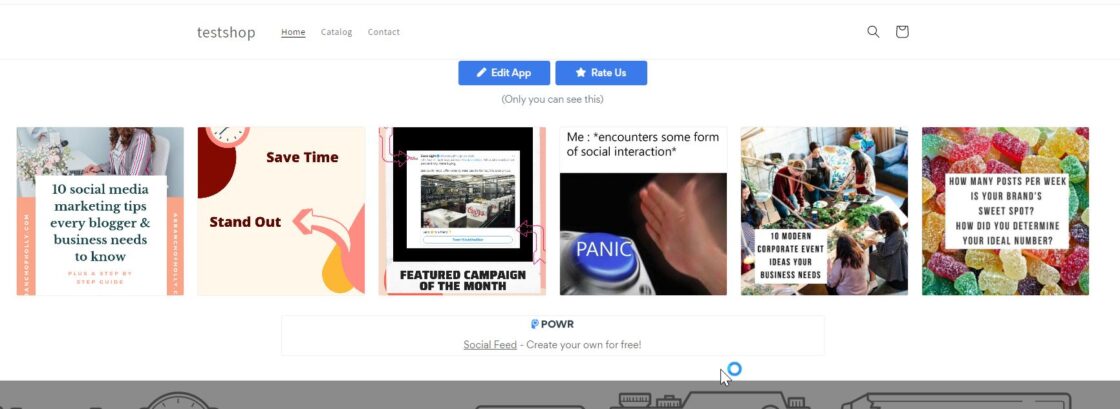
And done! Now if you visit the Shopify page you have selected during the setup, you will notice the social feed is live.
Some Limitations of Using App Store for Feed Integration:
- You’ll be restricted to a small subset of social networks, while Juicer offers a staggering 15+ different platform integrations.
- There’s not much room for customization.
- Extremely visible branding.with free setup
Add Social Media Feed to Shopify with an Aggregator (Highly Recommended)
If you run a Shopify store, this is the most effective method for integrating a social media feed into your site. A social media aggregator app, such as Juicer, will allow you to fine-tune the appearance and content of your feeds for optimal performance on your Shopify store.
Juicer’s compatibility with Shopify’s integration with social media includes the following: Facebook, Twitter, Instagram, YouTube, Hashtags, Tumblr, Slack, LinkedIn, Pinterest, Blog RSS, Giphy, Soundcloud, Flickr, Vimeo and Yelp.
Here’s how it’s done:
Step 1:
To begin, create an account with the Juicer. In order to create an account, all you need to do is follow this link.
Step 2:
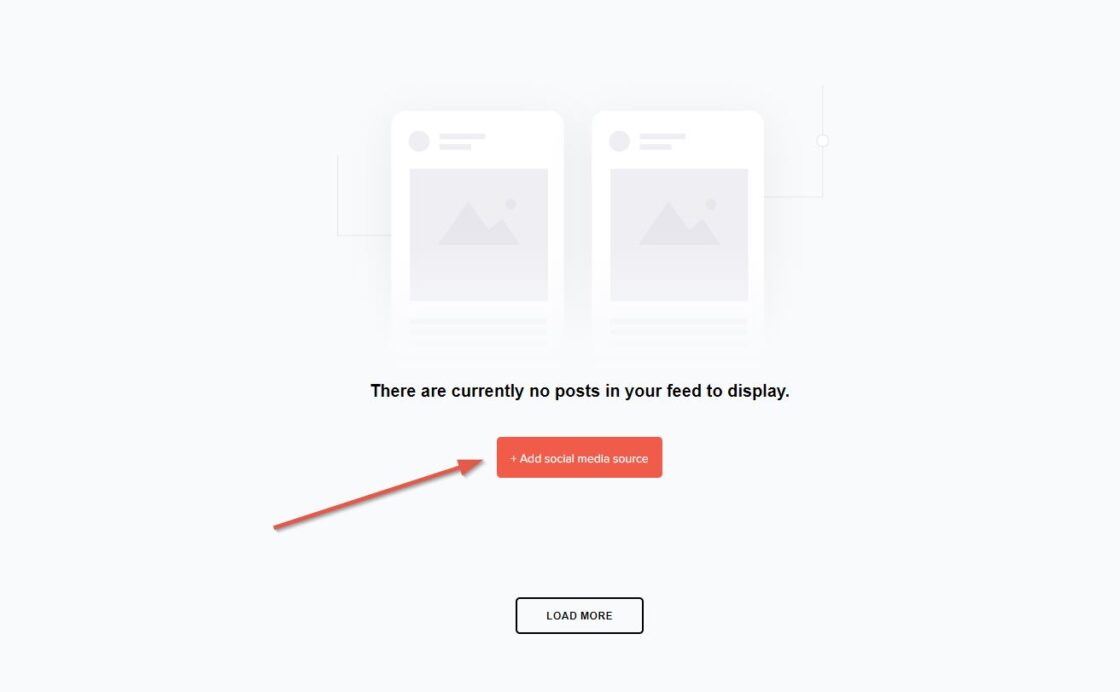
Once you’re all set up, head to your dashboard to connect your social media accounts. In case you have any questions or need assistance, you can reach out to us anytime.
Step 3:
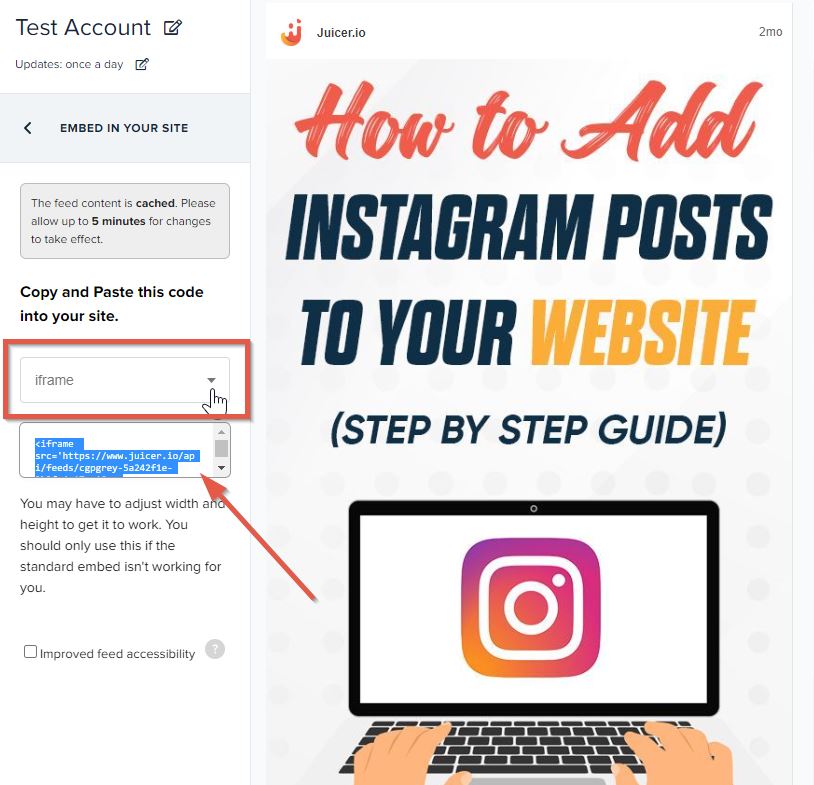
When your feed is ready, select “Embed in your site” from the left-hand navigation.

Step 4:
At this step, you might see “Standard Website” is selected on the drop down menu. Change it to the “iframe” option. And your iframe embed code will be generated. Simply copy the code and paste it elsewhere. This snippet of code is also available for copying at any time in the future.
Step 5:
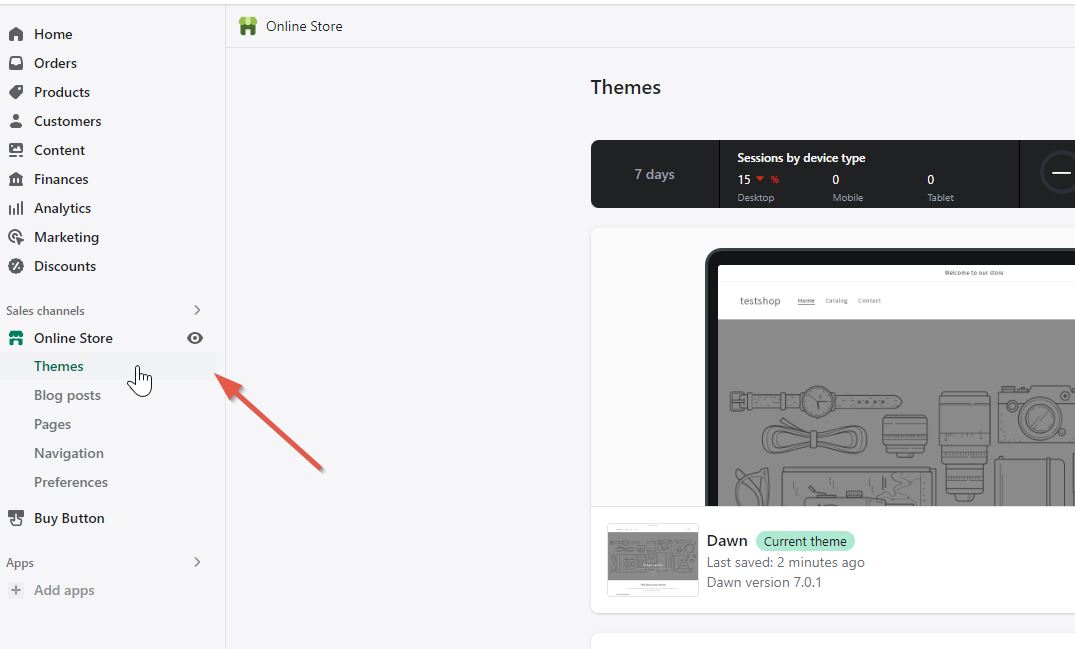
Go to your Shopify dashboard. Under Sales channels menu from the left sidebar, select “Online Stores” and then click on “Themes”.
Step 6:
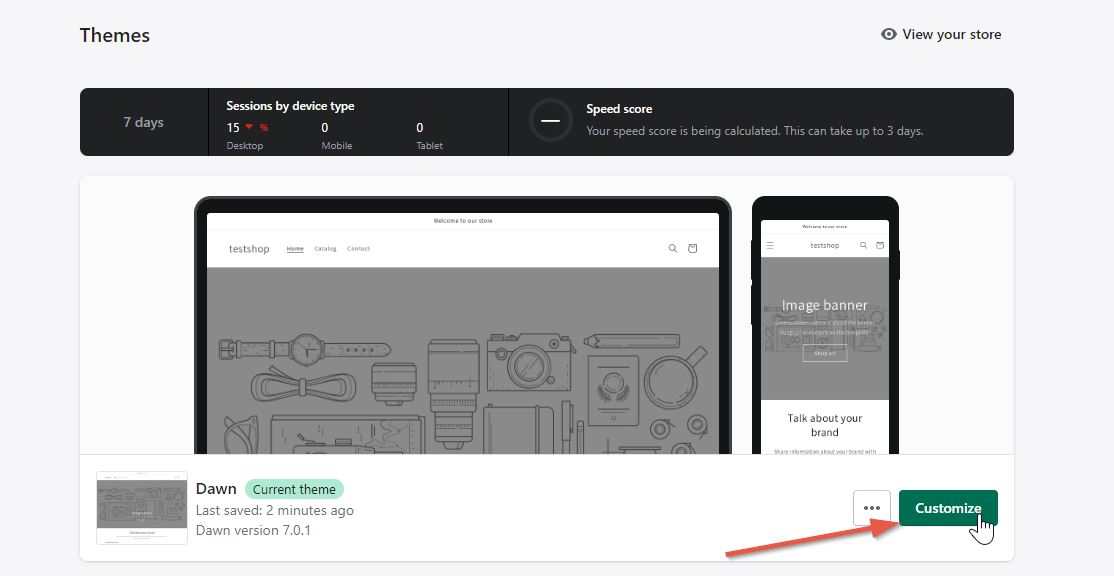
Then click on the “Customize” button.
Step 7:
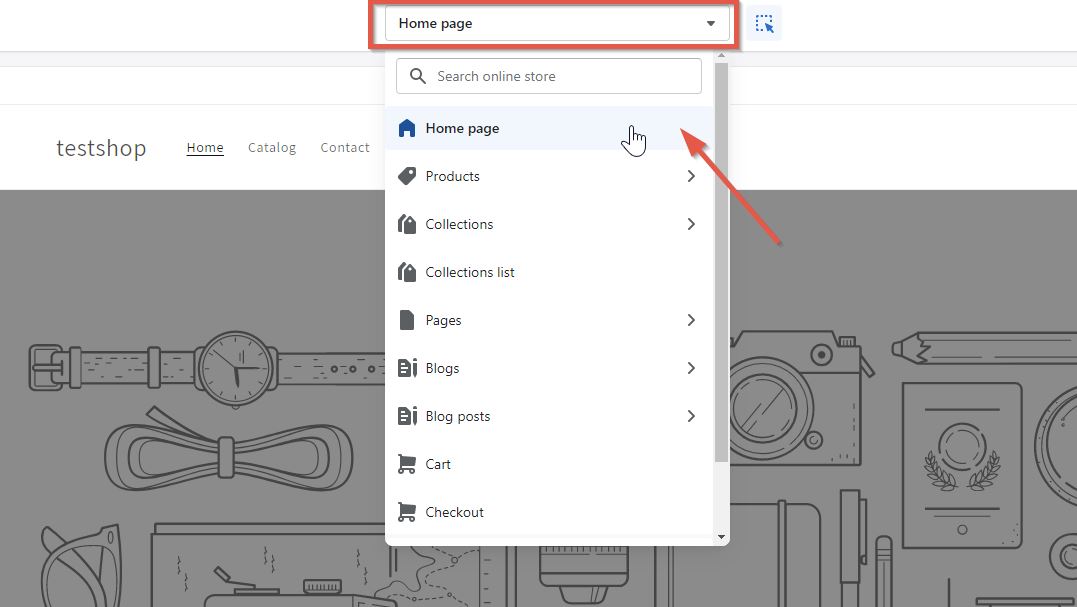
Select the page where you want to showcase your social feed from the top drop down menu. In this example, we will select the home page.
Step 8:
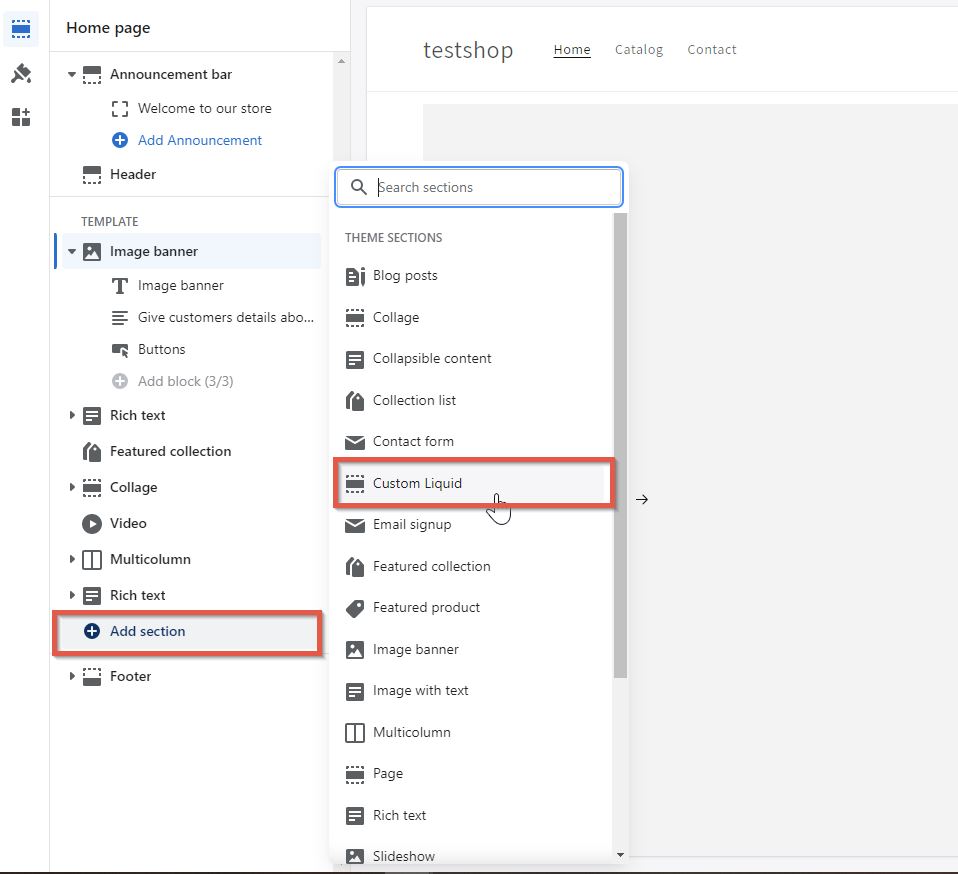
Create a new section somewhere on the page where you would like to add the feed. Click on “Add New Section” from the left menu and choose “Custom Liquid”.
Step 9:
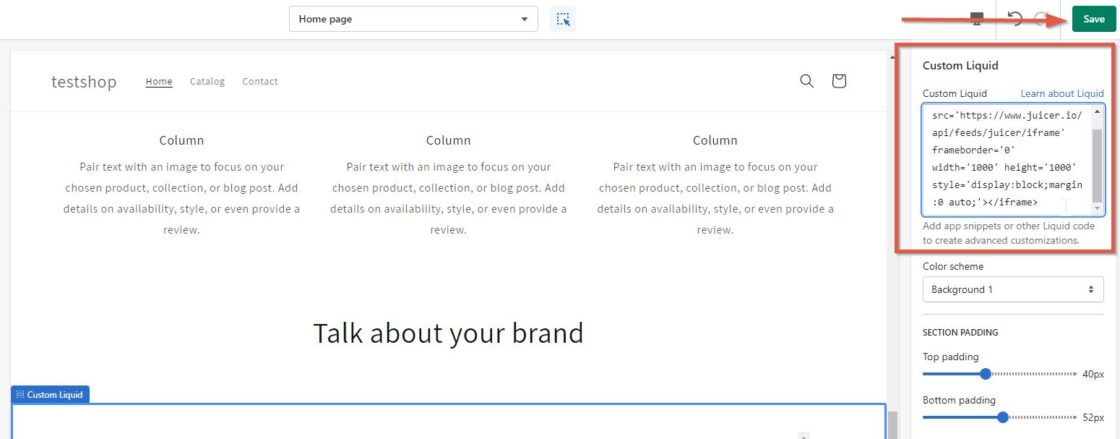
After your new section with custom liquid is created, copy the iframe code that you have generated with Juicer and paste on the “Custom Liquid” code section, then click on save.
Step 10:
And done, now you can go to that page’s live view and see that your social media feed is flawlessly embedded into your chosen Shopify page.
