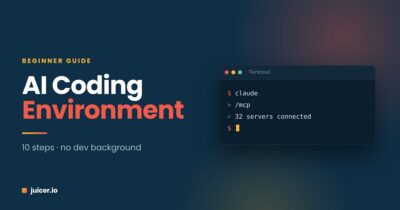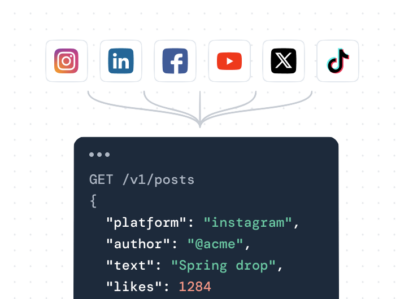

Hey guys, it’s Paul here, CEO at Juicer.io. Exactly one year ago, my life took a 180-degree turn. My developers showed me a very ugly-looking tool called Terminal. It’s already installed on your Mac (or you can use PowerShell on Windows). At first glance, it felt like I was back in the ’90s. Today? I don’t use anything else. Three computers, three terminals open, with plenty of tabs and agents running stuff for me. Here’s a short guide for dummies like myself on how to set up your own environment for experimenting with the API. Just a few simple steps to help you speed up your operations a lot. You do not have to be a tech person to do so. Just follow the below 10 steps, and you start building your own dashboards, systems, and PRs for developers 😄
Step 1: Finding the tool
On Mac → go to Apps and search for “Terminal”
On Windows → search for “PowerShell”
Step 2: Installing Claude or Codex
Open Terminal/PowerShell → If you use Claude paste this one to terminal and hit Enter:
curl -fsSL https://claude.ai/install.sh | bashNext go through the authentication with Claude browser and connect it with Terminal (so you can use Claude Code through the terminal)
If you use Codex paste this:
npm install -g @openai/codexIt will also ask you to authenticate → do it.
Step 3: Connecting APPs → Warning!
Connect all of your apps through ChatGPT / Claude in browser / desktop app.
In Claude go to settings → customize → connectors and connect all of the apps you work with (Gmail, Outlook, Canva, Notion, Slack, Juicer.io, whatever you use).
In Chat GPT go to settings → plugins → connect all of the apps you use (Juicer.io, Gmail, Outlook, Calendar, whatever you use)
WARNING: Just remember that by adding permissions and connecting the apps, you usually give the AI both read and write permission to the app. Just double check what you want to share with AI, and turn-off auto-learning for LLMs from your data.
Step 4: Starting the session
Open a new terminal window with “ctrl and t” / “command and t”
Always write “Claude” when you start a new session or Codex —> depending on which one you use
Step 5: Create a dedicated project folder for AI memory.
Tell Claude/Codex to save everything in a single folder it creates for you. Tell it you want to keep working in that folder and save notes about your progress so it can pick up where you left off.
Working in a terminal is different from using Claude or ChatGPT in desktop or browser apps. Save important context, decisions, and progress in files so your agent can read them later and understand what you’ve been working on. Simply keeping everything in one folder doesn’t automatically preserve its memory.
Remember this!
Step 6: Initialize the MCP
Input the command: /mcp
You will get the list of tools that you are connected to. It will allow claude/codex to communicate with all of them and build things for you

Step 7: Passwords + API keys
This is something that will change your way of working. MCPs are great, but API keys are even more powerful (and you look cool, like a hacker). There is one rule nobody tells you, and I got it wrong at the very beginning, so do not repeat my mistakes 🙂
Never paste passwords or API keys directly into the terminal.
They stay in your shell history and in the session transcript. Put them in a .env file instead, but set up the guardrails first , before that file exists.
Step 7a: Set the guardrail (once, before you create any .env)
Paste this into Claude:
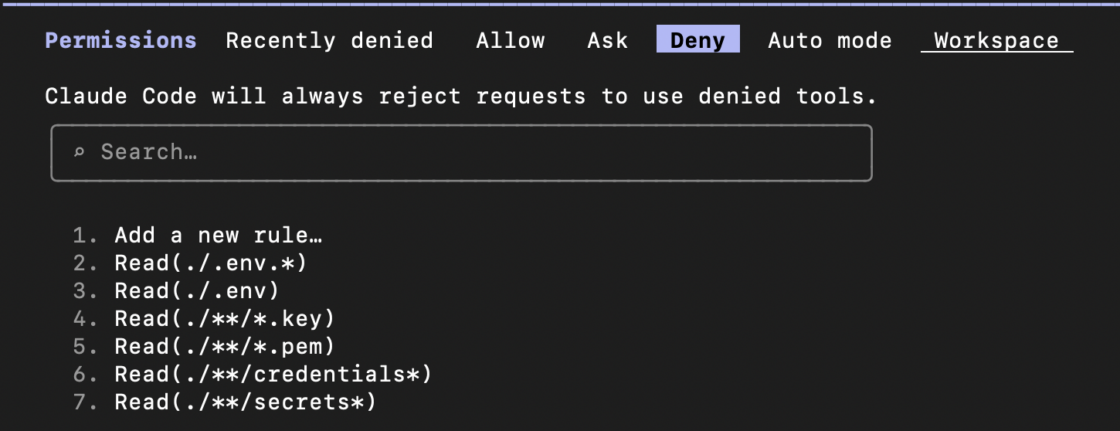
Add these entries to the permissions.deny array in my ~/.claude/settings.json,
creating the file or the section if it doesn't exist, then show me the result:

Read(./.env)
Read(./.env.*)
Read(./**/*.pem)
Read(./**/*.key)
Read(./**/credentials*)
Read(./**/secrets*)
This writes a real rule into a real config file. It is checked by the tool itself before Claude runs, in every future session, in every folder. Typing “never read my .env” into the chat does not do this, that is just a message, it is forgotten the moment you start a new session, and it is a polite request to the model rather than a lock.
To check it worked, type /permissions and look at the Deny list.
Step 7b: Create the .env yourself
Don’t ask Claude to create it or open it. In the terminal:
touch .env
open -e .env        (on Windows: notepad .env)
Paste your key inside the .env file (not terminal) as NETLIFY_AUTH_TOKEN=your-key-here, save, close.
Step 7c: Keep it out of your project history
If you use git, tell Claude: “add .env to .gitignore”. A leaked key is almost never leaked by someone reading the file. It is leaked by it being committed or pasted into a log.
Step 7d: How Claude uses the key without seeing it
The tools (Netlify, Vercel, Supabase) read the key from the environment themselves. So you say:
“deploy this with Netlify, the token is in .env, load it into the environment, don’t print it.”
Claude passes the value straight to the tool. It works, and the key never appears in your chat.
Step 8: You are now DEVELOPER (Just kidding → but almost there).
You can code, create your apps, dashboards, whatever you wish. How to test it? Just take the API Key from here: https://www.juicer.io/sign-up?plan=api-sandbox&mpevent=hero_signup_api
Once you’ve generated your free Juicer API key, try this as a practice exercise: ask your agent to analyze your Instagram or LinkedIn profile, or use your company’s profile and compare it with competitors. Ask it to show you the available data and highlight the key differences. See how powerful it is!
Important note: Before deploying it, always ask Claude/Codex to generate the HTML output first and open it in your browser so you can preview it and correct/improve if needed.
Step 9: Deploy Your App with Netlify or Vercel.
You have the data, you like what you see, and you want to share it with others? Bring your dashboard, or your own vibe-coded app to life by deploying it with Netlify or Vercel. Both offer free plans, with usage limits, for hosting your project’s frontend.
Once you’ve created an account, ask Claude/Codex to help you deploy your project. If you need an access token, store it securely in a local .env file, keep that file out of Git, and never expose the token in your frontend code.
Step 10: Store Data Using Supabase
Ok, all good. You have your projects but you want to store the data somewhere. You can use supabase to do so. Simply register with a free plan and create your own database for projects that require it. It works exactly the same, just an API key, and that’s it.
Create the API key on their website, add it to your .env by hand as in Step 7, and tell Claude the name of the variable, not the value.
Enjoy your nice journey with “coding”. Now you can create agents, and speed up your daily operations a lot! 10 simple steps that can improve your work a lot!