
With over 300 million monthly active users, X (Twitter) is one of the most widely used social networking sites. In order to keep their readers aware of the most recent happenings in the world of blogging and online conversation, many bloggers and website owners wish to embed their X (Twitter) feed on their WordPress site. You may boost interaction, amass social proof, and attract new followers by connecting your WordPress blog to your X (Twitter) feed. By the way, we also have a complete guide on how to do X (Twitter) timeline embed on any website.
The idea of adding a X (Twitter) feed to WordPress might put off those who are unfamiliar with web development. However, it’s a straightforward procedure that only necessitates a few basic actions to complete. In this article, we’ll show you how to embed a X (Twitter) feed into a WordPress site, from building the widget to displaying the feed. So, shall we?
Method 1: Add X (Twitter) Feed to WordPress Website without Any Tool (Very Limited Options)
Step 1: Go to edit mode of a page or post in WP
To add X (Twitter) posts to a post or page, open it for editing within your site’s wp dashboard.
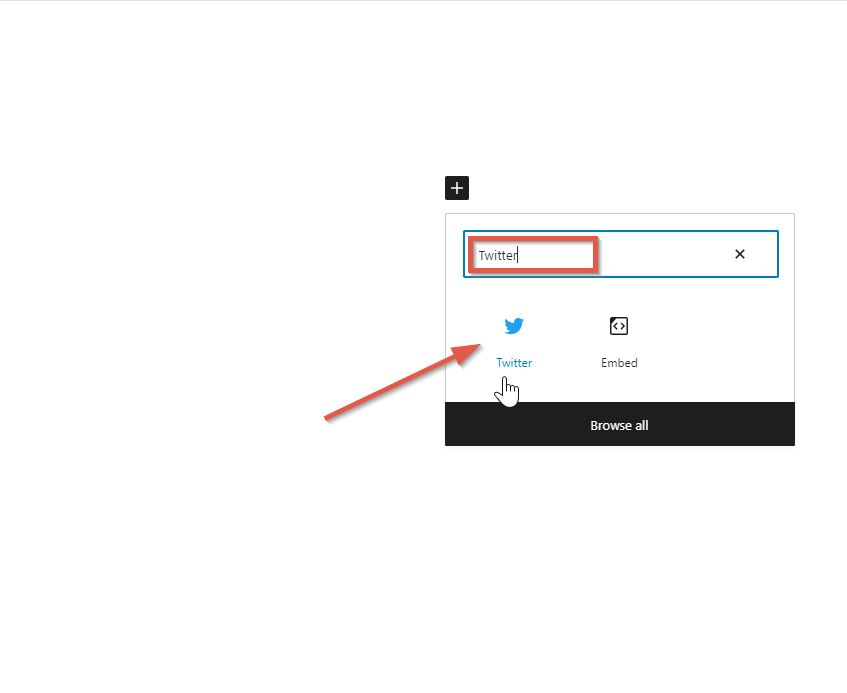
Step 2: Find the X (Twitter) Block
Click on the “+” sign to add a new block and search for twitter. You will see a block option with the Twitter logo, select this.
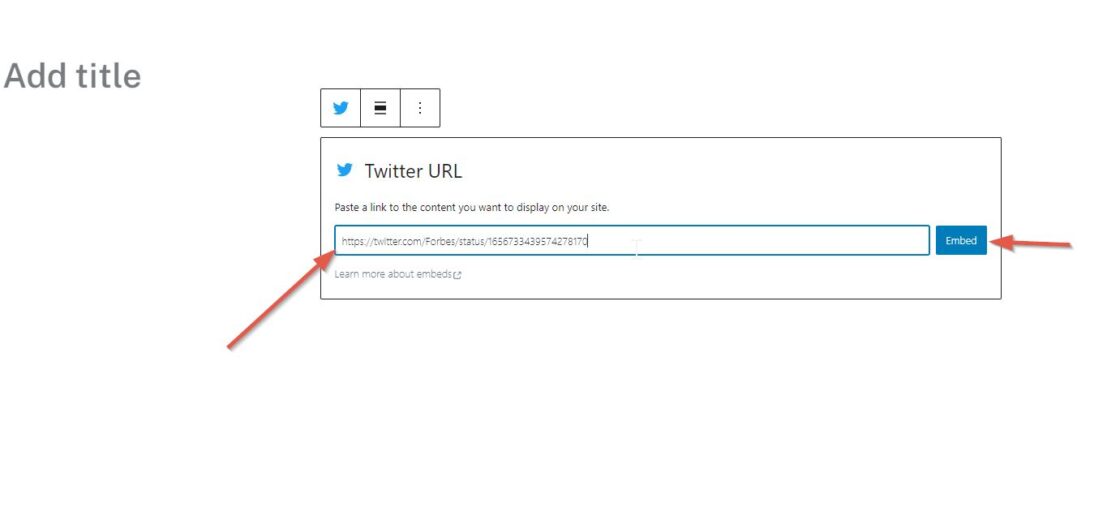
Step 3: Copy and Paste the Post (Tweet) link
You can now add a single post (tweet) by copying and pasting a link to that post (tweet). Add your X (Twitter) profile URL, then click the “Embed” button to embed a widget displaying your most recent posts (tweets). Note that you can’t stylize this embed or do other customizations.

Step 4: And it’s Done
The widget should now be visible in your WordPress site’s preview. Previous posts (tweets) can be viewed by scrolling down if you embedded a X (Twitter) username/profile. If you embedded a single post (tweet), it will be visible along with links to replies and some other options.

Method 2: Add a X (Twitter) Feed with Full Customizations to a WordPress Website with the Juicer Widget
Step 1: First, get yourself signed up for a premium juicer account.
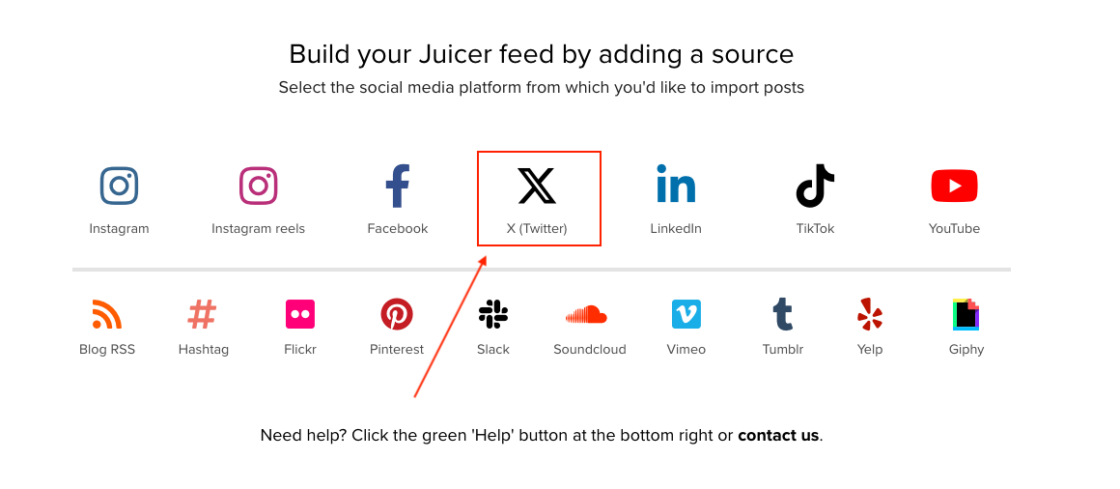
Step 2: link your X (Twitter) account and give your feed a name
Click the “X (Twitter)” icon, then give your Juicer feed a name and connect it to your X (Twitter) account.
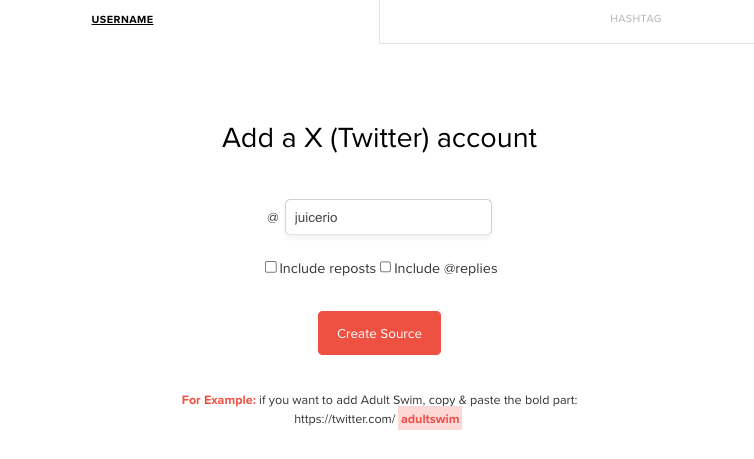
Step 3: Add the X (Twitter) username or a hashtag
When you click the button, a new window will pop up with “USERNAME” highlighted. Replace “@juicerio” with your X (Twitter) handle. To include replies and reposts, just check the boxes under your name. Press the “create source” button when you’re ready to begin. You can also select the “Hashtag” option here instead of a username.
Step 4: Install Juicer’s X (Twitter) embed WordPress plugin on your wp site
Get the Juicer X (Twitter) widget Plugin from WordPress’s official plugin repository, then activate it. You can also just type “Juicer” into the WordPress plugin repository search bar to locate the add-on.

Step 5: Go back to your Juicer account dashboard
Now to embed the desired post or hashtag feed on your WordPress site, head to your Juicer.io admin dashboard and select “Embed In Your Site” from the left-sidebar menu.

Step 6: Select “WordPress Site” from the dropdown
Notice that “Standard Site” is selected by default. Please select the “WordPress Site” option instead from this dropdown menu.

Step 7: Copy the generated embed code
Done! You can now incorporate any X (Twitter) timeline or hashtag feed into your WordPress site by using the generated shortcode or PHP methods. If you like, you can even make a social wall out of your posts (tweets).
In conclusion, if you use WordPress for your website, adding a X (Twitter) feed is a fantastic method to boost interaction with your audience and keep them aware of your most recent posts. If you follow the instructions in this article, you’ll be able to show your posts on your WordPress website in real time using your X (Twitter) account. You can make your X (Twitter) feed look great on your wp site and provide useful information for your visitors with the help of Juicer.