If you’re pulling in hashtag posts from a social media network like Instagram or X (formerly Twitter), you probably want to prevent certain content from being displayed on your web pages. Social media walls displayed on websites, digital screens, and digital signage require sophisticated content filtering to protect against malicious content, inappropriate posts, and harmful material that could damage your brand reputation.
With Juicer you can easily add multiple types of content filtering to your social content and collect content from multiple sources to ensure only relevant content appears on your website. We offer built-in social media moderation and filtering features that help you block unwanted posts so only engaging posts that you approve get through to your web pages and social media channels.
All paid Juicer plans include full social media moderation and filtering capabilities. Moderation and filtering features are available starting with our Medium plan. You can try all features, including moderation and filtering, with a 7-day free trial of our Large plan by signing up at juicer.io/sign-up.
The “Moderate and Filter” Panel
Juicer’s social media moderation features are easily accessible from the main dashboard of any feed. Remember that in Juicer’s terminology, feed = the embeddable social wall, and source = a single source of social media content that appears within the feed, such as a Facebook page, Twitter account, Instagram hashtag, etc.
A social wall is a curated display of social posts that appears on web pages and digital displays, providing real-time user-generated content for hashtag campaigns and live events while maintaining brand safety through proper filtering. This social wall tool enables you to display user-generated content in today’s digital world.
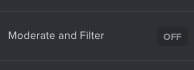
Click the “Moderate and Filter” button along the left-side menu to bring up these features. If you’re going here for the first time, it will say “Off” next to this button. After you have enabled any of the features, it will say “On” next to this button.
Switching Between Public Social Media Posts and Moderated Social Media Posts
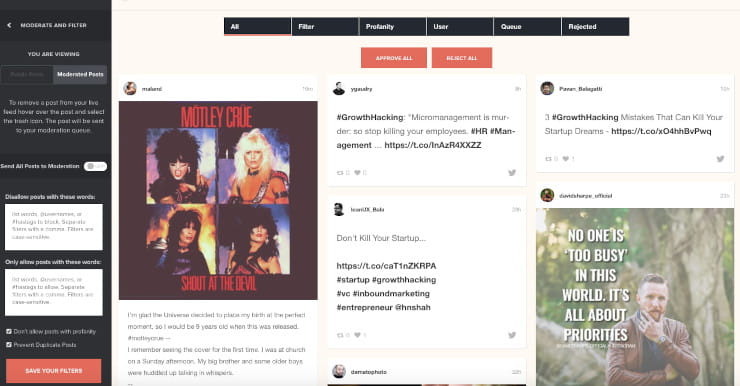
At the top of this panel is a toggle switch that allows you to choose between “Public Posts” and “Moderated Posts.”
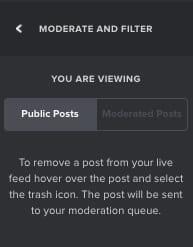
When the Public Posts button is highlighted, the social media posts you see in the panel to the right are currently in your live feed. When the Moderated Posts button is highlighted, the social media posts you see have been blocked from your feed by your social media moderation filters and are awaiting your review.
The Moderation Queue
Next is the “Send All Posts to Moderation” button. This is a popular feature that gives you the most control over what appears in your social media feed and protects your web pages from any potentially harmful content.
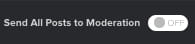
When enabled, this will send all social media posts directly into your Moderated Posts section. No post will appear in your live social media feed or social wall without your approval. You will browse through the Moderated Posts and click “Approve” or “Reject.” If you want to clean out this section, you can also click “Approve All” or “Reject All” at the top.
This feature is particularly valuable for maintaining brand safety on web pages where your social wall is displayed, ensuring that every piece of user-generated content meets your standards before becoming visible to website visitors.
Automating Your Moderation/Filtering
The rest of the features in the Moderate and Filter panel allow you to automate what is blocked and approved for your social media feed. These advanced content filtering systems work across all major social media platforms to ensure consistent protection for your web pages.
First are the “Disallow posts with these words” and “Only allow posts with these words” fields. These represent two different types of content filtering approaches – blocklist filtering and allowlist filtering.
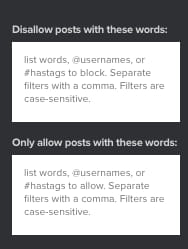
Please note: These two fields are not case-sensitive, so capitalization doesn’t matter. They’re also flexible about formatting, meaning all of the following formats will work:
- Apple, orange (with space)
- Apple,orange (without space)
- Apple , orange (spaces around comma)
Using newlines to separate words instead of commas is also acceptable, which might be more readable for longer lists:
- Apple
- Orange
- Banana
These filtering tools work similarly to enterprise content management systems, providing comprehensive protection against harmful content while maintaining the quality of your social wall display on web pages.
When to use the “Disallow posts with these words” field:
- Specific users on a social network are posting unwanted content using your hashtag. You can enter their usernames into this field to block their posts.
- Your hashtag is being used by another group. You may be able to find a certain word or phrase that is used consistently in those unwanted posts, which you can enter into this field.
When to use the “Only allow posts with these words” field:
- You have entered your social media accounts as sources for your feed, but you only want to display posts containing a certain hashtag. You can enter that hashtag into this field. Note that this will only display the hashtag posts from your source accounts, not from other users across Instagram, Twitter, etc.
- You are pulling in posts for a hashtag, but you only want to display posts that contain the source hashtag and another hashtag simultaneously. You can enter the second hashtag into this field, and Juicer will sort through the posts to display only those that contain both hashtags.
The Profanity and Duplicate Post Blockers
These two simple checkboxes will keep many unwanted posts from entering your social media feed and protect your web pages from harmful content.
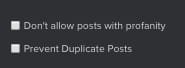
The library of profane words and statements that will be blocked by “Don’t allow posts with profanity” is immense and constantly updated to catch new forms of malicious content and harmful language. This advanced filtering system protects your website visitors from inappropriate material across multiple social media platforms. It is unlikely you will need to add more inappropriate words into the “Disallow” field, as our filtering system provides comprehensive coverage for business and brand protection needs.
The “Prevent duplicate posts” filter will block posts that contain identical text and are from two different sources. This protects against spam attacks and malicious content distribution attempts. Juicer can’t analyze images, so the post text must be identical to trigger this filter.
These automated filters work like search engine filters to maintain content quality while ensuring your social wall displays only appropriate content for web page visitors.
Saving Your Filters
Remember to click the “Save Your Filters” button when you have made any changes to your content filtering settings.
You will be able to apply your change to all existing posts in your feed and to new posts, or only to new posts going forward. This flexibility allows you to maintain consistent filtering across your social wall display while accommodating updates to your web page content requirements.
When you save filters, they immediately take effect across all social media platforms connected to your feed, ensuring uniform protection for your website visitors regardless of whether content comes from Instagram, Twitter, Facebook, or other social media accounts.
Approving and Rejecting Your Moderated Posts
Juicer sorts your moderated posts into several sections to make approving and rejecting posts easier.

- All – This contains every post that is currently in your moderation area, with the exception of posts you have already rejected from the moderation area.
- Filter – These posts have been blocked by the “Disallow posts with these words” and “Only allow posts with these words” filters.
- Profanity – These posts have been blocked by the “Don’t allow posts with profanity” checkbox.
- User—These posts have been manually removed from the “Public Posts” area by hovering over them and clicking the trash can icon.
- Queue – If you have enabled the “Send all posts to moderation” feature, this section will display posts not blocked by other filters. This will be the section you primarily work from if you are looking for posts to approve and reject for your feed.
- Rejected—These posts have been rejected from the “Moderated Posts” area. However, you can still approve them from here, even after initially rejecting them.
Related:
How to embed LinkedIn feed on website
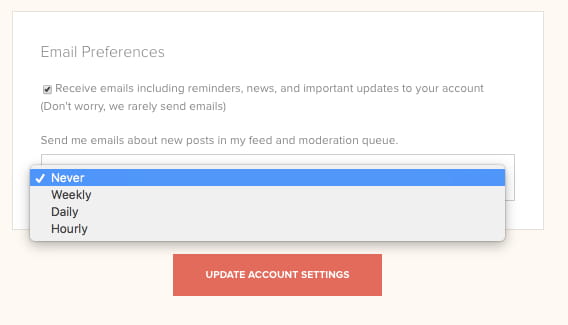
Get Notified When New Posts Are Awaiting Your Approval
From your Account Settings, you can enable email notifications that alert you when new posts are in your feed or awaiting approval in your queue.
Planning to Send All Posts to Moderation? This Trick Will Make Sorting Through Posts Easier.
When you enable the “Send all posts to moderation” feature, the other filtering features become faded and un-clickable. However, if you enable these other filters prior to turning on the “Send all posts…” feature, it can make your post approval process simpler.
For example, if you enable the “Don’t allow posts with profanity” feature prior to turning on the “Send all posts to moderation” feature, then posts with profanity will be blocked from the “Queue” section of your Moderated Posts. This way, you don’t need to sort through posts with profanity when finding posts to approve.
You can apply this to any of the other filtering features, such as “Disallow posts with these words.” After these are set up how you want them, you can turn on the “Send all posts to moderation” option and work from the “Queue” section of your moderated posts. You will avoid having to sort through posts you definitely don’t want in your feed.
Comprehensive Protection for Your Social Wall
Juicer’s content filtering and moderation features provide multiple types of content filtering to ensure your social media wall displays only appropriate content on your web pages and digital channels. From automated profanity detection designed for business environments to sophisticated keyword filtering that rivals enterprise content management systems, these tools protect against malicious content and irrelevant content while maintaining an engaging user experience.
Whether you’re displaying user-generated content from Instagram, X (formerly Twitter), Facebook, or other social platforms, these filtering tools ensure that harmful content never reaches your website visitors. The result is a safe, brand-appropriate social wall with carefully curated content displayed that enhances your web pages rather than putting them at risk.
As always, if you have any questions or need assistance with the moderation and filtering of your posts, please contact us via chat or email. We’re happy to assist you in creating the perfect content filtering solution for your website and social media platforms.