To embed a single Instagram Reel on your website, open Instagram in a desktop web browser, find the Reel, click the three dots (…) in the top right, choose “Embed”, copy the code, and paste it into your site’s HTML. That covers one Reel. To embed all your Instagram Reels as an auto-updating feed across any website, including Squarespace, WordPress, Wix, or a custom HTML site, use a free aggregator like Juicer instead.
Both methods work, and this guide walks through each one step by step. If you would rather display your whole profile instead of just Reels, see our companion guide on how to embed an Instagram feed.
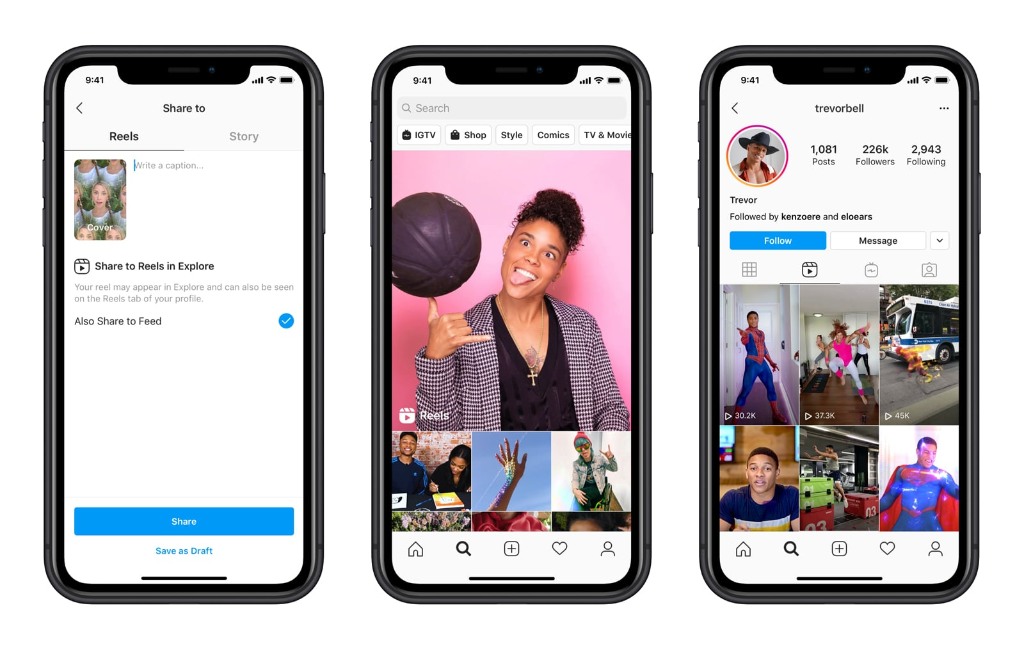
Instagram Reels are short-form videos that sit on their own tab and can surface on the Explore page, so bringing them onto your own pages is a simple way to add fresh, dynamic content, show social proof, and keep visitors on your site longer. Here is how to get them embedded.
What “Embed” Means on Instagram, and What Happens When You Embed a Reel
On Instagram, “embed” means placing a live copy of a public Reel, post or profile on another website using code that Instagram provides. Nothing is downloaded or re-uploaded. The Reel stays hosted on Instagram, your page loads it through Instagram’s embed.js script, and it plays inline with the creator’s username and a link back to the original. Instagram allows this only for public accounts, and any public account can switch it off with the Embeds setting in its privacy settings.
Because the embed is a pointer, whatever happens to the original happens to your copy. Edit the caption and the embed updates. Archive or delete the Reel, or take the account private, and the embed goes blank. That is the trade-off for a method that is free and needs no login: you get the real Reel, but you do not control it.
How to Embed a Single Instagram Reel Manually (The Official Way)
Instagram does include a native embed option, but it comes with real limits you should know before you start:
- You can only embed one Reel at a time.
- The embedded Reel does not update automatically when you post new content.
- You cannot customize how the embedded Reel looks on your site.
- The Reel must be on a public account. Instagram’s embed code is served through its oEmbed endpoint, which only returns content from public profiles, so a Reel on a private account will not embed.
- The embed is tied to the original post. If you (or the original creator) later edit, archive, or delete that Reel, or switch the account to private, the embedded version breaks and shows nothing. A native embed is a live pointer, not a saved copy.
If you just want to drop one specific Reel onto a blog post, homepage, or landing page, the native method is fine and free. Here is how to embed an Instagram Reel one by one:
- Open Instagram in a desktop web browser and log into your account. (The Embed option is only available on the web, not in the mobile app.)
- Navigate to the Reel you want to embed.
- Click the three dots (…) in the top-right corner of the post.
- Select Embed from the menu that appears.
- Click Copy embed code.
- Paste the code into the HTML of any page where you want the Reel to appear.
That single video will now show on your site. If you want more than one Reel, an automatically updating wall, or a feed you can style to match your brand, the manual route gets tedious fast. That is where an aggregator comes in.
Faster: Paste the Reel URL Instead of the Embed Code
On some platforms you do not need the embed code at all. Paste the Reel’s URL and the editor converts it into the embed for you. This works through the same oEmbed system as the code method, so the same limits apply: public accounts only, one Reel per paste, no styling.
- WordPress: paste the Reel URL on its own line in the block editor, or into the Instagram block. WordPress core stopped converting Instagram URLs on its own in 2020, so this needs a plugin that restores it, such as Jetpack. Without one, use a Custom HTML block and the embed code from the previous section.
- Squarespace: add an Embed block and paste the URL. If the block shows a broken preview, switch it to code mode and paste the embed code instead.
-
Substack: paste the Reel URL on its own line in the post editor. If Substack refuses the Reel link, replace
/reel/with/p/in the URL and paste it again; Instagram serves the same content at both paths and Substack accepts the second form.
If the URL paste fails anywhere else, the embed code from the previous section always works in an HTML block.
How to Embed All Your Instagram Reels Automatically (Auto-Updating Feed)
Embedding Reels one by one means re-doing the whole process every time you post. To display a living feed of your latest Reels that refreshes on its own, you can use Juicer to pull in your Reels and embed them as a single social wall.
This approach works on any website, whether it is plain HTML, PHP-based, or built with Squarespace, WordPress, Wix, Shopify, Weebly, or Joomla. Here is the full setup:
Step 1: Sign up for Juicer (it is quick and free)
Create a free Juicer account. It only takes a moment, and the free plan is enough to get a Reels feed live.
Step 2: Pick Instagram as your source
Right after signing up, you will see a list of social networks. Click Instagram to continue.

Step 3: Connect your Instagram Reels
From the Instagram options, choose “Reels from a Username” and connect your account. This sets the source to Reels only (an only_reels filter that excludes regular photo and carousel posts), so the feed displays your latest Reels automatically rather than your whole grid. Unlike a native embed, this connects through your authenticated account, so it keeps working as you publish new Reels.

A quick heads-up: Meta (which owns Instagram and Facebook) requires a Creator or Business account to connect Instagram this way. Juicer never stores your password or personal information during the connection.

Step 4: Add your Reels to your social wall
Once you have authenticated, you will be returned to Juicer with your account name in the connection modal. Click Connect, and your Instagram Reels are added to your social wall. This is your auto-updating Instagram aggregator feed, the same hub experience you can manage from one dashboard.

Step 5: Embed your Reels feed
Now display the feed on your site. Click Embed in Juicer and pick the output that fits your platform:
- JavaScript (Default): the most popular option, works on almost any platform.
- WordPress: a dedicated option for WordPress sites.
- iFrame: handy for older platforms that do not support JavaScript.
Copy your code and add it to your site. The next sections show exactly where that code goes on the most common platforms.
Embed Your Reels Feed on Squarespace
Squarespace does not have a built-in Instagram Reels block, but its Code Block is built to hold custom embed snippets, which makes adding a Juicer Reels feed straightforward:
- While editing your Squarespace page, click an insert point and add a new Code Block where you want the feed to appear.
- Paste your Juicer JavaScript embed code into the Code Block. Leave the block’s display mode set to HTML (not Markdown) so the script runs instead of showing as text.
- Save and apply your changes.
- Preview the page to confirm the Reels feed displays correctly.
Because the feed is powered by Juicer, your Squarespace site stays in sync: new Reels appear automatically without you re-editing the page.
Embed Your Reels Feed on WordPress
To add a Reels feed to a WordPress site, you have two easy options:
- Install the free Juicer WordPress plugin from the official plugin repository, then copy the shortcode shown in your dashboard into any page or post. You can also use the Juicer PHP function if you prefer.
- Or use the WordPress embed output from Step 5 and paste it directly into a block.
Either way, your WordPress site shows a live Reels wall that updates as you publish.
Embed Your Reels Feed on Wix, Shopify, or a Custom HTML Site
The same JavaScript embed code works everywhere else, you just drop it into each platform’s HTML-embed element:
- Wix: in the Wix Editor, click the + to add an element, choose Embed then Embed HTML, and paste your Juicer code into the HTML box. Resize and position the element, then publish.
- Shopify: add your code through a Custom HTML section in the theme editor (no code editing needed), or, for full control, go to Online Store > Themes > Edit code and paste it into the section or template where you want the feed.
- Custom HTML site: paste the Juicer code directly into your page’s HTML wherever you want the Reels feed to render.
Juicer also publishes platform-specific setup guides for major site builders, so you have a reference for whichever platform you use.
Placing the Reels feed outside the page body
The embed code is not limited to the main content area. In WordPress, drop the shortcode or the JavaScript snippet into a Custom HTML block in a widget area to show the feed in a sidebar or footer, or into a template file if the feed should appear on every page of a section. Squarespace footers, Wix strips and Shopify sections take the same snippet. One thing to keep in mind for page speed: each native Reel embed loads Instagram’s script and video player, so a page with several of them gets heavier with every Reel, while a Juicer feed is one script however many Reels it shows. If you want more than two or three Reels on a page, the feed is the lighter option as well as the easier one. The Instagram feed widget page shows the other things the same feed can pull in: your regular posts, a hashtag feed, Stories and mentions, with moderation and keyword filters on top.
Instagram Reel Embed Not Working? Common Fixes
A blank space or a broken card where the Reel should be almost always comes down to one of these.
Native embed (the three-dots code or a pasted URL)
- The account is private, or went private after you embedded. Native embeds only work for public accounts.
- The account turned off Embeds. Instagram lets any public account disable embedding in its privacy settings. The “Embed” option disappears from the menu and existing embeds stop rendering.
- The Reel was deleted or archived. The embed is a live pointer, so there is nothing left to show.
- Your builder stripped the script. The WordPress Visual tab, a Squarespace Code Block left in Markdown mode, and Wix text elements all do this. Paste into an HTML-capable block instead.
-
An ad blocker or cookie-consent tool is blocking
instagram.com/embed.js. Test in a private window with extensions off, and check whether your consent tool needs Instagram allowed as a third-party script. -
You pasted a URL where the editor cannot convert it. Only editors with an Instagram oEmbed provider turn a bare URL into an embed. Use the embed code instead, or on Substack try the
/p/form of the URL. - You are looking for the Embed option in the mobile app. It only exists on the web.
Juicer feed
- The source needs a Creator or Business account. Switch the account type in Instagram’s settings, then reconnect the source.
- You connected the whole account instead of “Reels from a Username”. The feed then shows your full grid. Add a second source with the Reels option, or edit the existing one.
- The feed has not synced yet, or hit an Instagram limit. The not seeing new posts checklist walks through the causes and fixes.
- On WordPress, the feed name in the shortcode does not match the feed name in your Juicer dashboard.
- The element holding the code is too short. Give it height, or remove a fixed height so the feed can grow.
Manual vs Automatic: Which Method Should You Use?
Both methods are valid. The right one depends on how many Reels you want to show and whether you want the feed to maintain itself.
| Method | Best for | Keeps itself updated? | Customizable? | Reels-only curation |
|---|---|---|---|---|
| Native Instagram embed | A single, specific Reel on one page | No, it is a fixed snapshot that breaks if the Reel is edited or deleted | No | One Reel, hand-picked |
| Juicer auto-feed (JavaScript) | A wall of your latest Reels on any platform | Yes, pulls new Reels automatically | Yes, layout and CSS | Yes, the “Reels from a Username” source filters out regular posts, and you can moderate by keyword or hashtag without code |
| Juicer WordPress plugin | WordPress sites that want a shortcode | Yes | Yes | Same Reels-only source as the JavaScript feed |
If you only need one hero Reel on a landing page, the native embed is the fastest path. If you want an ongoing, on-brand Reels wall that you set up once and forget, the automatic feed saves you the repeat work.
Why Embed Instagram Reels on Your Website?
Short-form video is the format people lean into, so putting your Reels on your own pages is a fast way to make a site feel alive to every visitor, not just your Instagram followers. What embedding Reels specifically buys you:
- Video social proof. A wall of real Reels is a strong form of user-generated content (UGC): products in use, behind-the-scenes clips, and customer moments are more convincing than static images for someone deciding whether to trust you.
- Movement on the page. Auto-playing short clips give visitors something to watch the moment they land, which can hold attention longer than text alone.
- A reason to follow. Visitors who enjoy your Reels on-site often tap through to your Instagram profile, turning site traffic into followers.
Embedding Instagram Reels might sound technical, but as you have seen, it comes down to either one native embed for a single Reel or a one-time Juicer setup for an auto-updating Reels wall. If you also post short-form video elsewhere, you can embed it the same way: see our guide on how to embed a TikTok video feed.
Try Juicer free and get your Instagram Reels feed live today.