Why add social media feeds to your Webflow website?
There are several advantages for your business that can be gained by embedding a social media feed into your Webflow pages. Sharing the values and goals of your company with your audience can boost engagement and foster new connections. Visitors to your website will remain interested in your business and informed on the latest promotions, events, and news if you integrate your social media profiles into your site design. You may be able to boost customer loyalty and attract additional fans by employing this strategy.
Second, integrating social media into your Webflow pages is a great way to build trust and credibility for your brand. Putting your best reviews, client comments, and endorsements from thought leaders in your field front and center on social media is an effective way to increase your social proof. Displaying this type of content on your website is a great way to show off your brand’s social reputation and get more people talking about your company. Over time, this can help establish your brand as reliable and trustworthy, which can result in more customers and higher profits.
Related Reading:
To embed linkedin posts on your business website, read this guide on how to embed a LinkedIn feed on a website.
How to add social media feeds on Webflow pages
Add Social Media Feed to Webflow Easily with an Aggregator (e.g. Juicer)
This is the best way to embed a social media feed into a website built with Webflow. With the help of a social media aggregator app like Juicer, you can modify the format and content of your feeds so that they work best with your Webflow pages
.Juicer’s compatibility with Webflow’s integration with the following social media platforms: Facebook, Twitter, Instagram, YouTube, Hashtags, Tumblr, Slack, LinkedIn, Pinterest, Blog RSS, Giphy, Soundcloud, Flickr, Vimeo and Yelp.
Step 1: Set up your account
You must first create an account with the juicer. Create an account for free right now!
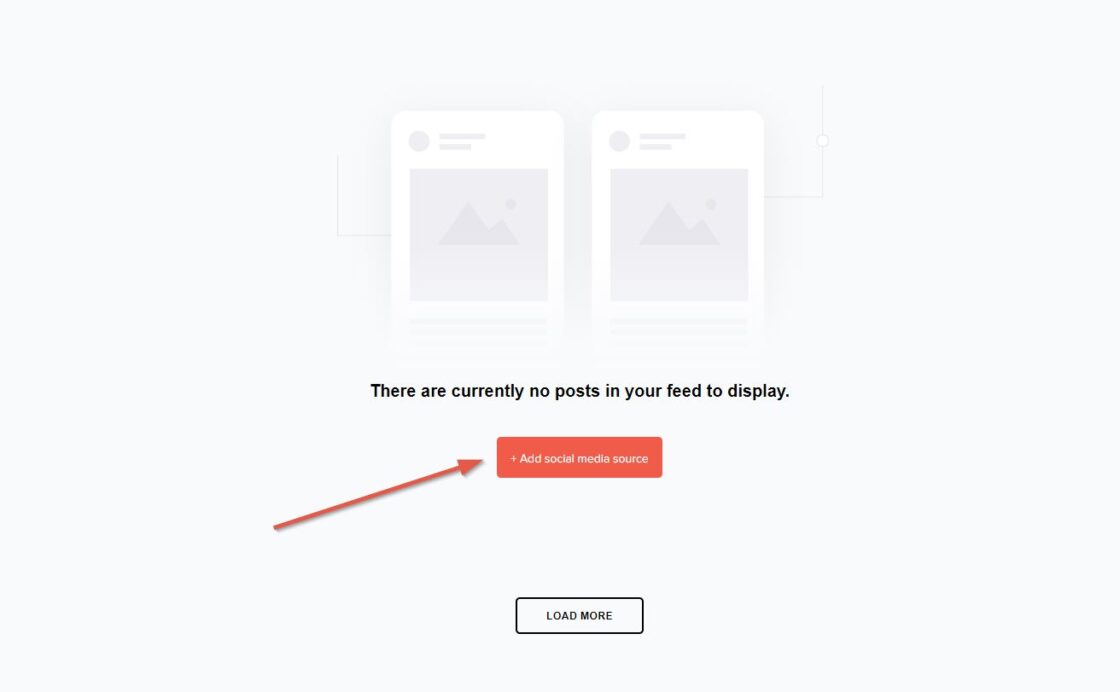
Step 2: Add your social media accounts
After you’ve set up your account, you can add your social media accounts in the dashboard. Please be aware that the free plan limits you to adding just two sources or hashtags. To get help at this stage, please contact us if needed.
Step 3: Add it to your website
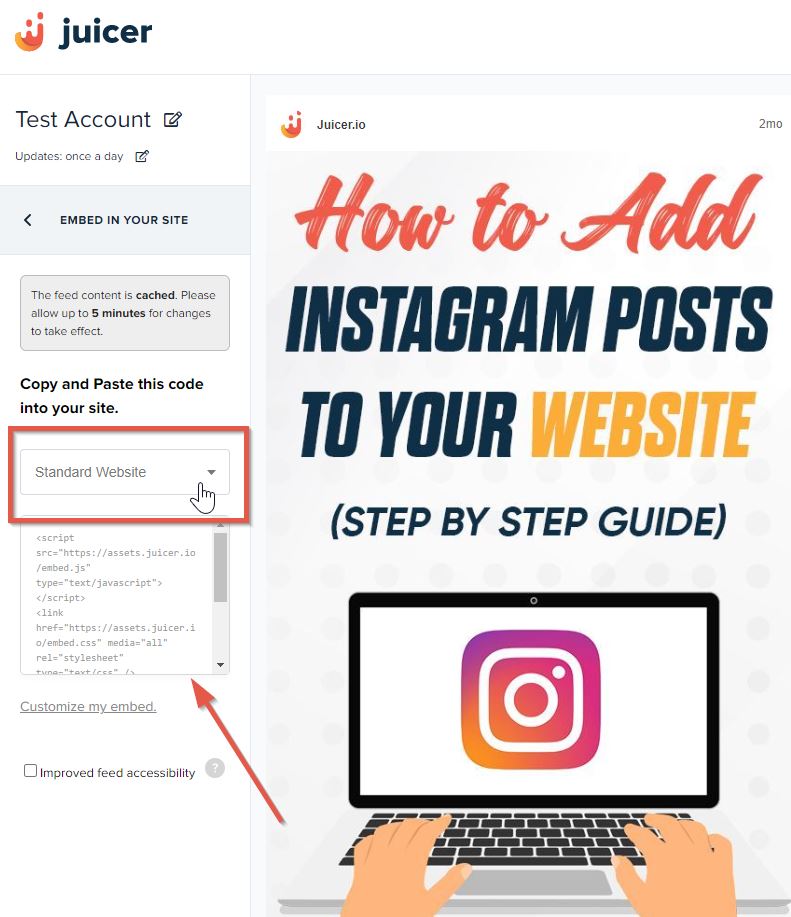
When your feed is ready, select “Embed in your site” from the menu on the left.

Step 4: Copy the code
Take note that the embed code was generated after selecting “Standard Website” from the drop down menu at the left. You can now copy the embed code and paste it elsewhere. You can also return at a later time to re-copy the code.
Step 5: Go to your Webflow page
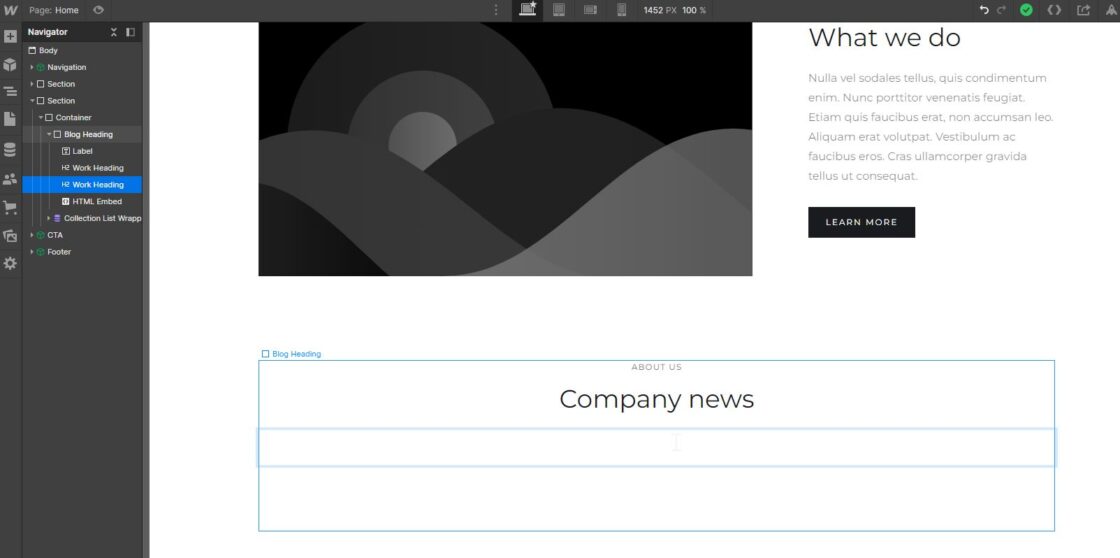
Now, go to your Webflow website editor and then to the desired page section where you would like to embed the social feed you generated with Juicer.
Step 6: Navigate to the Elements section
Now click on the “Add Elements” button from the left sidebar menu.
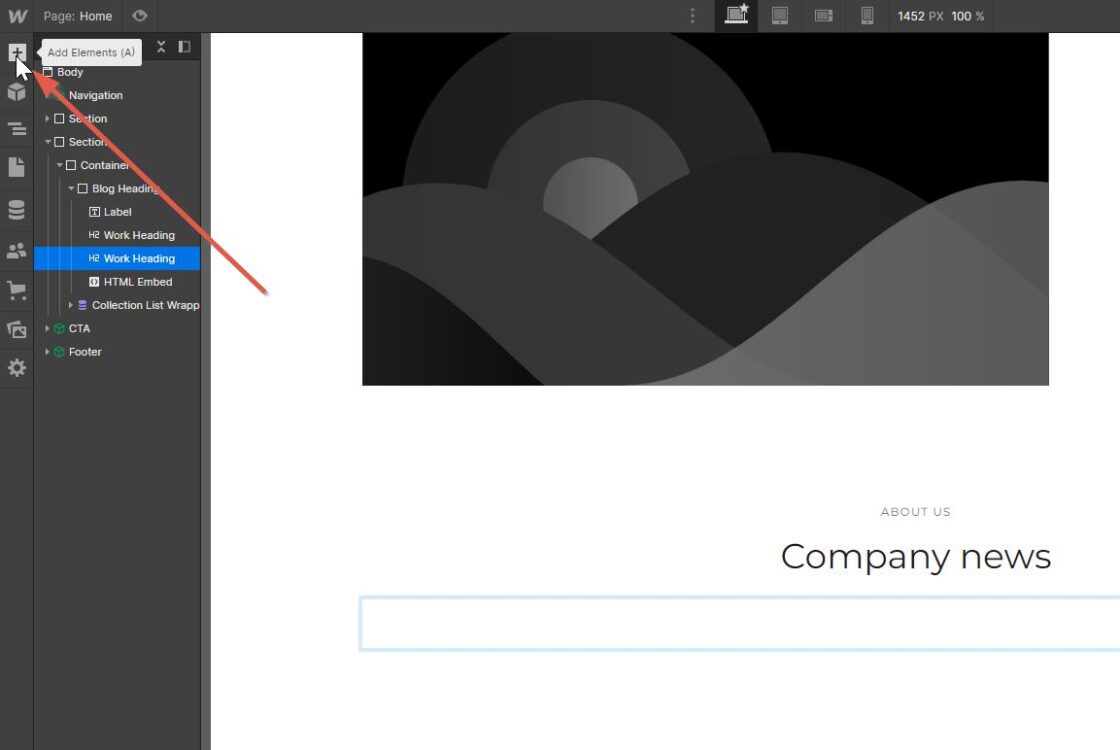
Step 7: Go to the “Advanced” section
Now scroll down to the “Advanced” section in Webflow and click or drag & drop “Embed” element to your page section.
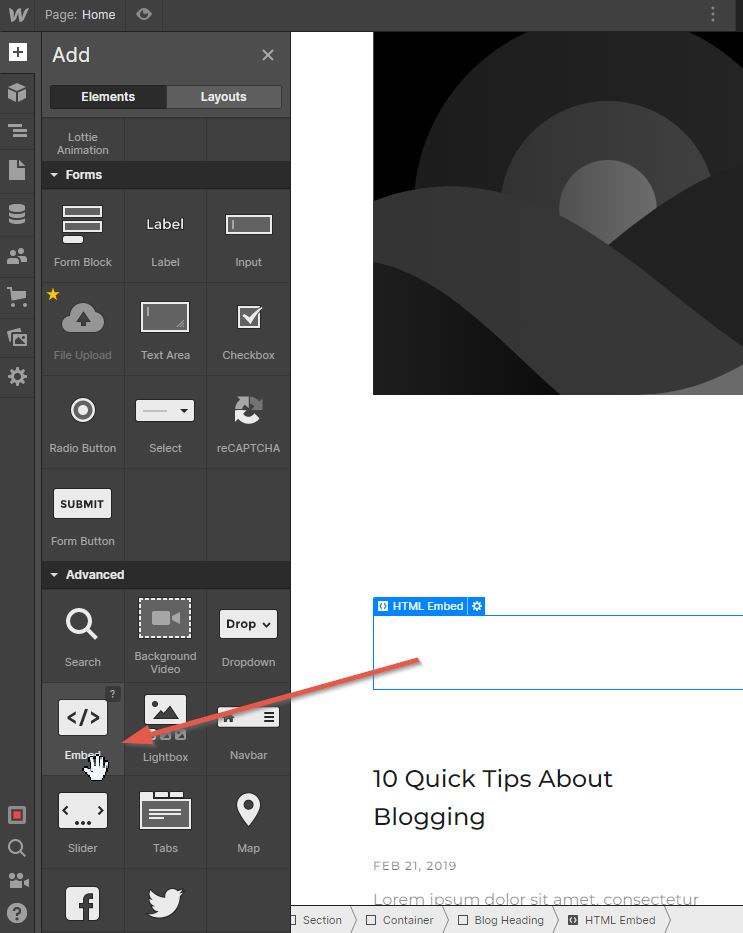
Step 8: Embed your code
Now click on the Element from your website section and a new pop up will appear. Simply copy your embed code that you generated with Juicer and paste here, then click Save & Close.
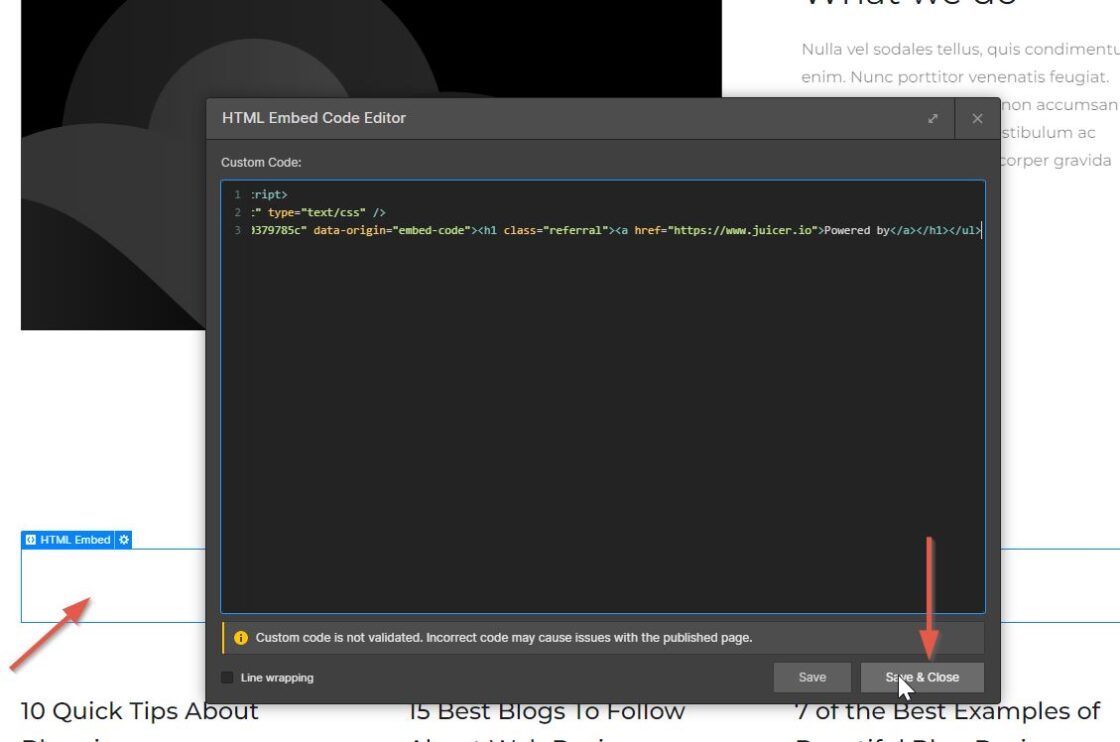
And done! Note that the social media feed will be visible on the live website and not in the editor.

Add Social Media Feeds on Webflow Manually (With Limitations)
Manually embedding a social feed on Webflow comes with a learning curve and has extreme limitations. There are no ready-made apps available directly from the platform, rather they suggest checking these platform-specific documents to add the feed:
- To add a Twitter feed, Webflow suggests following this lesson.
- To embed Instagram photos or other posts, they suggest following this documentation.
- To embed Pinterest share, save, pin, or profile widgets in your Webflow pages, they suggest following this page.
